Quantcast
Channel: XO | Noelle
Viewing all 925 articles
Browse latest View live

ColourPop Ultra Matte Liquid Lipsticks | Buds, Highball, Sundae, Mars & Drive-In - Swatches + Review

$
0
0
Hi love muffins! I'm back again with the fifth and last review of the ColourPop Ultra Matte Liquid Lipsticks - phew! If you missed them, make sure to check out the lightsthe nudesthe purples and the brights! Alrighty. Onto the bright, bright pinks! 
(Sorry for the darker lip swatch pictures!)
  • Buds - a shocking neon pink. Holy neon, y'all! Buds is more true to color in the arm swatch picture in the bottom right corner. It's a total neon Barbie pink with a blue undertone. So pretty!
  • Highball - a hot-red pink. Highball reminds me of a liquid version of MAC Candy Yum Yum, am I right? But way more pigmented and longer lasting.
  • Sundae - a vibrant pink magenta with subtle blue violet undertone. Sundae is so unique to me. Not only is it a fun shade but then there's a super subtle blue shimmer undertone that isn't quite shimmer-y at the same time. It's really weird to describe. It adds such a nice dimension to the shade.
  • Mars - a red fuchsia. Have you guys ever seen a picture of the planet Mars? It's mostly yellow, orange and black but it does have some red in it that totally matches this lipstick. I feel like this is more of a fuchsia-red emphasis on the red. The fuchsia is more of an undertone.
  • Drive-In - a mid-tone bright magenta. I wish the pictures could show how flattering this is! It's almost a berry-magenta and is so pretty in real life. This is also the only purple from this collection that didn't give me any streaky issues.
ColourPop | Shop ($6)

JORD Sully Red Sandalwood & Maple Watch | Review

$
0
0
I love watches! I'm not a huge jewelry person and do find myself wearing the same pieces every day but there's just something about wearing a watch that makes me feel a little more put together. Welcome to the family, JORD Sully Redwood & Maple Watch, I think you're here to stay.


The Sully Red Sandalwood and Maple Watch comes with a bubbled bezel, fun, larger numbers and a wide, chunky band that has been pretreated with tung oil. The mix of a darker wood with a lighter wood makes it so fun and casual. The wood gives the watch such a rich, luxe feeling. I absolutely love it. 

Also, this watch can hang, y'all! It's splash-proof (although they don't recommend getting it soaked) because y'know, sometimes it happens. Whether you're caught in the rain or your son spills his drink, it's nice to know it won't get ruined. The glass is a mineral scratch-resistant glass which is also very nice because I'm rough with my hands. I'm constantly cleaning, picking a child up, doing errands and hey, my jewelry goes through that with me.


The Sully watch comes in four different colors to chose from (the dark sandalwood + maple is GORGEOUS!) and - get this! - JORD will size the watch for you before it's even shipped out to you! 

Are you a watch kind of person? Would you rock a wood watch?

JORD | Sully ($139)
* Press sample

Two Ways to Instantly Thicken Your Hair | Toppik Hair Building Fibers + Colored Hair Thickener - Reviews

$
0
0
"Hi. My name is Noelle and I have thin hair.""Hi Noelle!" I know you've guys have heard this before but as we all know, I have thin hair. I know you guys have seen me try out various shampoos, conditioners and hair treatments before but most of those have results that aren't necessarily fast or instant - and who doesn't like instant results, am I right?


Lately, I've been trying out the Toppik Hair Building Fibers as well as the Toppik Colored Hair Thickener. They both achieve somewhat of the same results but in different ways. Let's get to it!

So first, we have the 
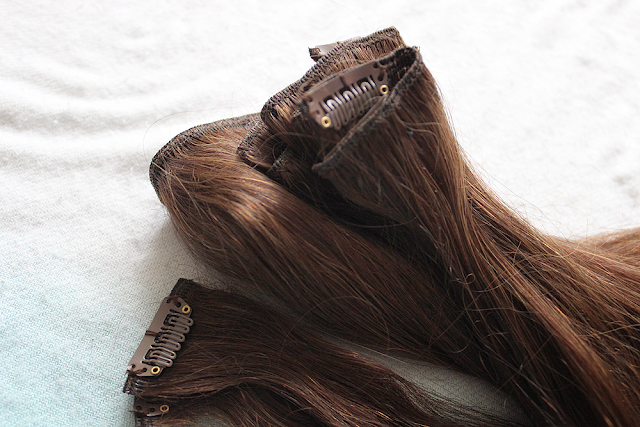
Toppik Hair Building Fibers (in dark brown). Remember, you should always match the fiber shade to your root color because that's where you'll be putting the product. The building fibers themselves are made of all-natural, keratin protein that blend into your hair to give it the look of full, thick, natural hair.


To apply, start off with completely dry hair. You can either sprinkle the fibers straight from the container to the thinning areas but it can get a little messy. I like to use the Toppik Spray Applicator for a more precise application instead.

To use the Spray Applicator (which took about a half an hour to figure because I refused to look at the directions), simply unscrew the cap and then pull of the sifter. Legit, I was convinced it would not come off but it eventually did! Then screw on the applicator and you're good to go! Spray away, babe!

(I can assure you it's not normally this awkward-looking. Unless you, too, take pictures of you using it.)

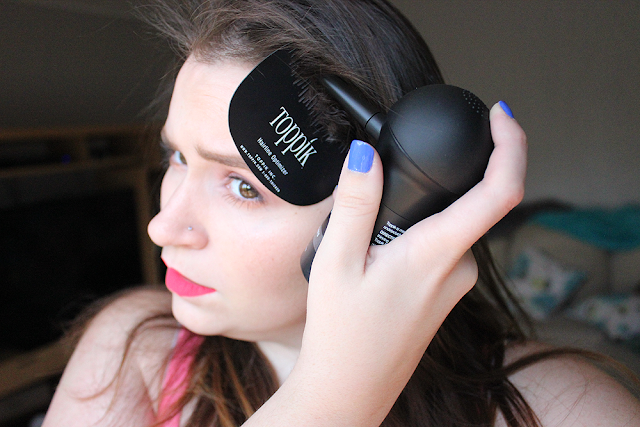
I feel like this is optional, but you can also insert the teeth from the Toppik Hairline Optimizer into the hairline for a more realistic look. It's basically a hair stencil but works well if you have thin hair near your forehead.


After you've applied the fibers, gently pat your hair to disperse the fibers and then finish with the Toppik FiberHold Spray. This spray basically keeps it put (even in rain, wind and sweat!) and strengthens the bond between your hair and the fibers. Think of it as a special hairspray for the fibers.

Before / After (but before patting to disperse the fibers)

If you don't want to use fibers, you can also use the Toppik Colored Hair Thickener. This spray a dry, colored powder into your hair to fill in any thin areas - kind of like a colored dry shampoo! 

Start with completely dry hair. Because my hair is more thin on the sides, I like to lift my hair right above my ears and spray there about 4-6" away from my head. After it's applied, you can style your hair or reapply for more volume. 

Overall: If you're looking for thick hair - fast - I highly recommend this! Keep in mind that this does not permanently change or put any help towards long-term results with thick hair. That being said, I'm okay with that. I personally like both options when it comes to choosing to use the spray or fibers. The spray, to me, is just like a colored dry shampoo which I'm used to. The fibers are a little bit more realistic if you have a lot of thinning. Both wash out in the shower. Which would you use?

Toppik | Shop
* Press Sample

Irresistible Me Hair Extensions (Medium Brown) 200G - Review

$
0
0
Let's talk about extensions, shall we?


The amazing people over at Irresistible Me Hair Extensions were amazing enough to contact me and let me try out their gorgeous Silky Touch 100% Remy Hair Extensions recently and I couldn't wait to share with you guys my thoughts.


Irresistible Me offers two different types of clip-in hair extensions:
  • Silky Touch - Made with 100% Remy Hair. These extensions are a little more price and user-friendly. These are perfect for those that are just starting out with clip-ins. The hair is easy to style, cut, color and use with heat. The thickness of the hair decreases slightly towards the end for a more realistic look. 
  • Royal Remy - Made with 100& Remy Hair. These extensions are more luxe and are their premium clip-ins. These are silkier, softer and will ultimately last longer than the Silky Touch extensions. These are also easier to blend, cut, color and style.

I chose to go full-on mermaid and went with the 24" 200g extensions but Irresistible Me offers so many different custom options with lengths and weights that you're almost guaranteed to find something that fits what you're looking for. My 24" 200g extensions came with:
  • 1 four-clip extension (7.5" width) - This is perfect for adding length and volume to the back. I apply this "middle ear height" in the back (does that make sense?).
  • 2 three-clip extensions (6") - I overlap these in the back "above my ear height" so they're right above the four-clip extension.
  • 5 two-clip extensions (4") - I lift my hair and apply one of these on each side of my head at temple height. The rest I use wherever I think there needs to be more volume.
  • 2 one-clip extensions (1.2") - I have yet to use these but I can imagine they'd be used to add more volume on the sides.

Confession time: These are my first go with clip-ins and I have to honestly say that they were SO easy to use. Since I haven't used clip-ins before I don't have much to compare to but have to admit that these were incredibly lightweight. I forgot I had them in a few times. I do recommend that if you have short hair like me, you might have a better time blending these with your hair if you cut some layers into them. That being said, as you can see below, they still look great even if you don't. I also got a chance to curl them and loved the outcome! They held the curls so, so well. 

Can I also just add how much easier and better looking my braids and messy buns look with extensions? It just adds so much more oomph into them and makes them look WAY better than without. Maybe it's because I have thin hair without them but it's a huge difference with and without. 

Before / After

Overall: I think I've found my holy grail hair extensions. Clipping them in is SO easy (even with thin hair) and never pulls on my hair while they're in. They're extremely realistic and soft. They're super manageable and easy to style and maintain as well. 

FYI: If you don't know what color you should get, they have an awesome video that can help you decide. I love how they move the hair in the video (below) so you can really see the color. My shade (medium brown) matches perfectly with my hair! Also, when you receive the hair, it comes in a little bag. There's a separate part of the bag that includes two wefts of hair to test so you can actually see if it matches before you open the other side. If they don't match (just don't open the bigger side of the bag!), you can send them back, no problem.


Irresistible MeShop
* Press sample

#UntBeautyTalk | BB Creams, CC Creams and more - oh my!

$
0
0
* This is a sponsored post for SheSpeaks/UNT.

One of my favorite things to do as a beauty blogger (but honestly don't get to do enough of!) is to try out products from different countries. It's so cool to see what's hot and trendy somewhere else. Unfortunately, due to shipping costs, sometimes they're a little hard to get which is why I'm so excited to introduce UNT

UNT is a skincare and cosmetics brand from Taiwan that believes everyone deserves healthy and comfortable skin - at an affordable price (here, here!) and they're on their way to the US! Fun tidbit: UNT is short for "Untitled" because they believe beauty cannot be represented by one verbal expression alone. UNT also feels that they cannot relate to just one form of beauty. Sounds like a brand I could get behind!

(Pinky: Sun Envy Gel Effect | Ring: Nail Lacquer | Middle: Gel Effect | Pointer: Nail Lacquer | Thumb: Gel Effect)

Up first, we have UNT's Nail Lacquer in Smitten (a bright pink), Sun Envy: Top Coat and Sun Envy: Gel Effect Lacquer in Party Animal (a pale, neon coral). There are over 200 different shades in the nail lacquer collection. The Sun Envy Gel Effect and Top Coat work together to get a nice, long-lasting color and a gel effect without a lamp. Start by applying two-three coats of the Gel Effect Polish and then top with the Top Coat. The top coat will cure from the sunlight to a shiny, hard, dent-proof mani.

Next up we have the Mineraluxe BB Cream, Naked Truth CC Cream, Eye Define Liquid Eyeliner and the Brow Master Dual-Ended Brow Pencil (all seen in the look above).
  • Mineraluxe BB Cream SPF30 (in Natural - Buy) - This BB cream is a lightweight, mineral-based cream suitable for all skin types including acne-prone skin. According to the site, there's a super-fine clay mineral called Illite that bridges over the pores to create a thin veil instead of filling them in like other BB creams. Unfortunately, the shade was a little too dark for me from the start and then oxidized and got even darker so I wasn't able to really wear it-wear it but besides the shade difference, I really liked it. It was very creamy and light on my skin. My skin actually felt softer while it was on and after which was a nice change. I'd definitely try this again in my shade.
  • Naked Truth CC Cream (in Fair - Buy) - Now this, this is my jam! Ultra-sheer with just the right amount of coverage to camo over redness but still let your natural skin breathe. I just dot this all over my face and then buff it in with a foundation buffer for a nice, light, flawless finish.
  • Eye Define Liquid Eyeliner (Buy) - The swatches below don't begin to even show how black this is. I would say this is very comparable to Kat Von D's Tattoo Eyeliner. Unfortunately, this doesn't dry matte and stays a little satin-y but man, oh man, the staying power on this baby is crazy. It has a nice flexible fiber tip that allows you to get the fleekiest flick for your cat eyes but with a little pressure can create a nice, bold line. Overall, I'm very impressed with this!
  • Brow Master Dual-Ended Brow Pencil (Buy) - I thought every brow pencil was created (somewhat) equal until I popped this open. One end is your typical spoolie brush to brush and blend out your pencil but the other end is a triangle-shaped pencil that helps you create a realistic hair stroke, add volume and dimension to your brows. I have no clue what's in this but it. did. not. budge. once I had it on. 

Swatches - Eye Define Eyeliner | Brow Master Dual-Ended Brow Pencil | Naked Truth CC Cream | Mineraluxe BB Cream

What are your favorite products from different countries? Would you try UNT?

Now's your chance to try UNT out because...IT'S GIVEAWAY TIME!
18 or older. US residents only, please!


* This is a sponsored post for SheSpeaks/UNT.

Top 15 | Favorite Dark Lipsticks for Fall

$
0
0
Let me just preface this by saying I do not believe dark lips are for fall/winter only. In fact, I think I rock dark lips more often than any other color. Dark lips are sexy, flattering for all skin types and match my soul. I'm kidding, I'm kidding.


From left to right:
  • ColourPop Ultra Matte Liquid Lipstick in Limbo
  • ColourPop Ultra Matte Liquid Lipstick in LAX
  • ColourPop Ultra Matte Liquid Lipstick in Tulle
  • ColourPop Ultra Matte Liquid Lipstick in Avenue
  • Smashbox "Be Legendary" Long Wear Lip Lacquer in Bordeaux
  • NYX Soft Matte Lip Cream in Transylvania
  • L'Oreal Plum Adagio
  • Kat Von D Bachelorette
  • Eddie Funkhouser Rumor
  • ColourPop Lippie Stix in Lady
  • ColourPop Lippie Stix in Cheers
  • ColourPop Lippie Stix in Tutu
  • ColourPop Lippie Stix in Tiger
  • MAC Diva
  • Bite Beauty in Elderberry
  • Bite Beauty in Black Cherry
What are your favorite vampy lipsticks? Do you wear certain shades for different seasons or do you rock them all year long?

Sh-mokey Eye with a Pop of Color

$
0
0
Before I even get into this look, how do you spell "smokey"? Do you spell it "smokey" or "smoky"? I just sat here for a few minutes like, "Wait. Is it with an 'e'?" Also doesn't help that I say, "shhhh-mokey" like Jim Carrey from The Mask (edit: I just watched the scene and it's "sssss-mokin'" not "shhhh-mokin'") My entire life has been a lie.


Ahem. Onto the look. I don't know if it's because I've been seeing sneak peeks of the second one everywhere for the holidays, but lately I've been obsessed with LORAC Mega Pro Palette. Have you guys seen swatches of the second one yet? They are totally drool-worthy! The first palette has so many amazing, buttery shades. You better believe I'll have the second one up for you guys once it drops! :)


For this look, I used:
  • LORAC Mega Pro Palette
  • L'Oreal Voluminous Superstar Mascara
  • L'Oreal Infalliable Makeup Extender Setting Spray
  • Mica Beauty Black Gel Eyeliner Pot
  • MAC Paint Pot in Painterly
  • Sigma Beauty Dual-Ended Eyeliner in Earth Goddess/Daydream


  • 1. Start with a clean base color closest to your real skin type. MAC Paint Pot in Painterly is my fave for mine. Next, you want to set that (especially if you're using a cream base). I used Fawn and took that all over the lid to eyebrow. What this does is creates a nice base for any other shadows that you put on top of it to help blend them easier.
  • 2. Then I took Brown into my crease with a Sigma Beauty crease brush and applied it in a soft, windshield-wiper movement.
  • 3. Then I took Indigo and packed it all over my lid. I highly recommend patting this onto the lid instead of sweeping it on. Indigo has all these gorgeous turquoise and pinky-purple glitters in it and patting it on helps keep them in place. Taking the L'Oreal Infallible Setting Spray, I sprayed the brush I was using for Indigo and went back in with it. I found using a setting spray (some like to MAC Fix+) really keeps the glitter in place and makes it pop since you're applying it wet.
  • 4. I went back in with Brown in the crease to smoke out and blend out Indigo. Take your time with this and keep blending.
  • 5. Wing it! I used the Mica Beauty Gel Eyeliner Pot in Black and created an "open-ended" cat eye. Apply your normal cat eye but when you're coming back from creating the wing, bring in up, slightly, into the crease of your eye. I hope that makes sense!
  • 6. We're almost done! For the pop of color, I used Sigma Beauty's Dual Eyeliner in Daydream and applied that to my lower waterline. Any color would do and adds such a fun twist to a look.
  • 7. Apply your lashes or oomph your own up! I used the L'Oreal Voluminous Superstar Mascara which is a two-part mascara. First, you apply the white primer and then the black mascara over it to get long, wispy lashes!

#StyleHunters4Ulta | Three Products That'll Cut Your AM Beauty Routine In Half

$
0
0
* Sponsored by Ulta Beauty/People StyleWatch
|| #StyleHunters4Ulta #UltaTrendAlert

Whether you're starting school or just heading out to another day at work, sometimes a few more minutes to sleep in before heading off to wherever you're going can make all the difference. I've got you covered with three of my favorite products that cut your morning getting-ready routine in half.


On top of saving you some minutes with your pillow, this post doubles as saving you some moola as well because all the products used are part of Ulta Beauty's 21 Days of Beauty Sale (woohoo!). The sale started 9/6 and goes on until the end of the month! Check these babies out in action below and make sure to write down the date they go on sale. You won't want to miss them!

  • Stila Convertible Color in Peony (available 9/24) - You need this in your life! The Stila Convertible Color doubles as a cream blush AND lipstick. MIND. BLOWN! Lightly tapping the product as a blush on your cheeks creates a gorgeous flush look while you can apply it to your lips either with your finger or with a lip brush for a natural, your-lips-but-better shade. Total time-saver!
  • Urban Decay Naked Skin Beauty Balm (available 9/18) - With three different types of BB creams to choose from in this sale - medium, illuminating and and bronzing - this is a total steal at 50% off (on sale $17/originally $34)! Using this in place of a full-coverage foundation, cuts down on time because I can apply this quickly and, dare I say, haphazardly (using my fingers or a brush) for a nice, glowy sheer-coverage look. This also includes a SPF20 so I know I'm protecting my skin while looking fab at the same time! 
  • Tarte Lights, Camera, Lashes 4-in-1 Mascara (available 9/13)  - Holy grail mascara right here! First off, the packaging is amaze, am I right? What I like to do with a mascara when I'm running late is apply to the top lashes like normal but apply a little more product to the outermost lashes (the ones closest to your temples) to make your eyes appear slightly larger and more open. Hopefully that makes a little sense but I swear it works! I also love the formula on this mascara. It's slightly drier than most mascaras out there right now which allows for a nice coating on the lashes without worrying about clumping.
Basically, these three products are my go-to look right now because, honestly, when am I not in a rush or running on little time with a toddler? The UD Naked Skin Beauty Balm keeps my skin nice and glowy with sheer coverage and protection with SPF20. The Stila Convertible Color is a total time-saver with the product doubling as a blush AND lipstick! Lastly, Tarte Lights, Camera, Lashes 4-in-1 Mascara helps my lashes looking nice and fluttery and with my little trick, makes my eyes pop and girl, do I need it with the amount of sleep I've been getting lately (teething toddler!).

Which deals are you going for? 

* Sponsored by Ulta Beauty/People StyleWatch
|| #StyleHunters4Ulta #UltaTrendAlert

Basic Double Wing

$
0
0
When in doubt, wing it out, am I right? And when you super screw up one wing, heck, add a second one. This is in no way perfection but I'm pretty proud nonetheless. It's fun to take (baby) steps in different directions and play around. What do you guys think of the double-wing? Would you rock it?

DEETS | MAC Paint Pot in Painterly as a base. ColourPop Cop-A-Feel all over the lid. ColourPop Girl Crush + Smashbox Brown in the crease. ColourPop Girl Crush on the bottom lid (not that you can really see it but y'know, just in case you were wondering). Tarte Lights, Camera, Lashes 4-in-1 Mascara. For the liner, I used my ol' faithful Maybelline Eye Studio Lasting Drama Gel Liner and then went back over it with UNT Eye Define Liquid Liner (love!).

Psst. What do you guys think about me featuring these quickie looks? Do you like 'em? Let me know!

#UNTBeautyTalk | Aqua Déluge Intensive: Extreme Moisture Firming Serum

$
0
0
* This is a sponsored post for SheSpeaks/UNT.

Hey babes! Last week, I introduced to you UNTa new beauty and skincare brand coming to the US all the way from Taiwan that believes beauty cannot be represented by one verbal expression alone. UNT also feels that they cannot relate to just one form of beauty. Last week, I reviewed some products from their beauty line (here) and this week I'm reviewing a little somethin' somethin' from their skincare line. Let's check it out!

This serum promises soft, supple skin from a unique blend of "Ultra Filling Spheres" - a new technology that blends Hyaluronic Acid and Konjac Root Extract to achieve a superior water-retention capacity and delivers intense moisture to the skin.  It also includes SYN®-HYCAN to boost the Hyaluronic Acid to increase the skin's self hydration. Lastly, Marula Oil and Royal Jelly are added into the serum to enhance skin regeneration and collagen synthesis for firmness.

Phew - talk about a mouthful! While I can't pinpoint exactly what it is from that laundry list of oils in the serum that makes this stuff awesome, I can tell you that they all work together perfectly!

The serum itself is not thick at all. It almost has a "moisturizing water" feel once it's rubbed in, if that makes sense. It's very light and leaves absolutely no greasy residue behind. I also want to point out that while I don't classify my skin as sensitive, sometimes my chin will freak out if I use a serum that's too thick/oily. I'm happy to report this serum didn't! Woohoo! Usually, with most serums, you apply them before your moisturizer or even mix them together but I've actually been using this serum by itself and have been impressed with the results: no break outs and nice, soft skin that doesn't feel greasy. This has become a new favorite of mine!

Do you use a serum? Have you tried products from overseas? Which ones are your favorites?

Use the code: UNT10OFF for 10% off the entire site!

Make sure to check out UNT's FaceBook page to receive info on upcoming giveaways and sampling programs!

The Empties | With Paula's Choice Skincare

$
0
0
Happy fall, ya'll (I've been dying to say that)! You may remember back in April, I was given to opportunity to try Paula's Choice skincare for a month or so. After a phone call with one of their (absolutely sweet!) skin consultants, they recommended me the Skin Recovery line for my super-dry skin.

Some may wonder, "So what happened after that month? Did you continue using those products?" You bet your sweet tuckus I did. The Skin Recovery line really helped with my skin, especially with the seasonal change. Does anyone else's skin do that? Sense a new season coming on and just completely freak out? Paula's Choice products really helped ease into the new season with subtle to no skin dilemmas.

While almost all the products have been used up, I decided to share with you my three favorites:


Skin Recovery Enriched Calming Toner(Buy) - Toners haven't always been a part of my skincare routine but this one made me a believer. The milky consistency feels really nice on my face after I wash it and also removes any extra dirt or makeup I maybe have missed. The fact that it also prevents anti-aging is a mega plus!

Skin Recovery Daily Moisturizing Lotion with SPF 30 (Buy) - I will definitely be repurchasing. I've found that it's hard to find a simple, light day moisturizer with sunscreen that I like. It's super lightweight with no fragrance and prevents visible signs of aging.

Skin Recovery Super Antioxidant Concentrate Serum (Buy) - Sometimes the product in the smallest packaging delivers the biggest punch. I absolutely ADORE this serum. The teeniest bit goes a long way. Sometimes I'll mix this in with my moisturizer (day or night) and sometimes I'll just use this on it's own before moisturizing. The serum contains a plethora of oils (Soybean, Grapeseed, Primrose, Cranberry - just to name a few) to ensure maximum moisturizing.


Psst. As a Power Primper , I am offering 20% off + free shipping with promo code:PRIMPFALL20to my readers! Expires: December 31st, midnight EST, One-time use only; cannot be combined with other offers or applied to previous purchase.

Looking to download PRIMP? Download here!

#BBCChallenge | Halloween - Who's Your Mummy?

$
0
0
Every year, I secretly countdown the months until it's finally pumpkin spice latte season, ahem, I mean fall. I don't know if it's the leaves changing, the sugar highs from candy or the Halloween specials that run on TV but I get so, so excited for October. I can't wait to show y'all the looks I have planned. Hopefully, from gore to pretty, there'll be a little something for everyone. 

With that, we are starting of the Halloween season right with challenge numbero dos of the BBChallenge! Woohoo! For those who don't know what the challenge is about or what it even is. The ladies of The Beauty Blog Coalition and myself get together at the end of every month and challenge ourselves to create something fun (whether it's with our makeup, nails or hair - whatever!) inspired by whatever the topic of the challenge is. (Have an idea for a challenge? Leave a comment below!)

This month's challenge is: Halloween!
I decided to be a mummy for a few reasons: 1.) I'm a mommy (mummy), get it? 2.) This is a total easy, last-minute look. Heck, you don't even have to do the other one and can leave it at one showing and one covered like below. 

I clearly need to work on a new background.


The details:
  • Eyes - MAC Painterly Pot as the base. Tarte smolderEYES Amazonian Clay Waterproof Liner in Gold all over the lid. Urban Decay Creme Brulee over the Gold to set it. Urban Decay David & Marg on the lower lid. UNT Eye Define Liquid Liner for the exaggerated cat eye (which I absolutely love!). Ardell Demi Wispies for lashes.
  • Face - It Cosmetics CC+ Illumination Foundation in Light. Smashbox Bronzer and Contour used as well as Pebble in the contour to add a little depth and grey-ness to it. 
  • Lips - I just used a concealer to white out my lips and then Smashbox Blackout in the middle of the lips with Gold on top.
  • Bandages are from the dollar store. One box of bandages covered my head. One for my arm. Basically, one box for each limb will do. What I love is that you can snag and pull at them to make them look distressed and old. I didn't but you can also add bronzer onto them or a brown shadow to age them.
Make sure to check out my other blogger babes and their fun Halloween looks:

Makeup Revolution | Iconic 2 Palette, Salvation Intense Lacquer in Gave You All My Love and Amazing Lipstick in Love Nude

$
0
0
Hi chickadees! How's your week going? I hope it's going it's going as fabulous as you are *insert cheesy wink*. Hahaha. Alright. Today's post is all about Makeup Revolution, a drugstore brand from the UK! They're also known in the beauty world for pretty killer dupes for some cult-fave palettes and such.


Iconic 2 Palette ($6) - The Redemption Iconic 2 is warm-toned 12 shadow palette. It contains three mattes, six metallics, three satins and three shimmers. It also comes with a dual-sided applicator (yes, foam applicator - not a brush). Does this palette look familiar? That's because it's known on the beauty block as an amazing dupe for the Urban Decay Naked 2 Palette. I'll compare the two in a second but let's talk about the shades in this palette first. 

  • #1 - a matte yellow cream.
  • #2 - a metallic orange-y bronze.
  • #3 - a soft satin champagne.
  • #4 - a metallic rose gold.
  • #5 - a matte taupe with purple undertones.
  • #6 - a satin blackened bronze.
  • #7 - a shimmery taupe.
  • #8 - a satin steel grey.
  • #9 - a metallic grey with pink undertones.
  • #10 - a metallic warm copper with micro glitter.
  • #11 - a satin brown.
  • #12 - a matte black.
I was going to go through each shade and note any issues but honestly, this palette was pretty fabulous. I had a minor issue with two shades but the rest were pigmented, smooth and had little to no fall out. The trouble makers were #1 and #11. #1 applied a bit chalky and barely showed up when used on the eye. That being said, my skin tone is similar to the color so that could obviously be it but I've read that others had issues with it showing up. The second troublemaker was #11. The first few swatches, it barely showed up and was super dry. After "scratching the surface", it seemed to apply fine and was very pigmented. So beware that some shadows might have that weird "coating" on the top that you have to get through before it applies normally. My absolute faves of the bunch would have to be #4, #5, #6 and #10.

 (Middle lid: #2 | Outer V: #11 | Crease: #5 | Lower lid: #5 and #2 | Inner corner: #3)
So how does it compare to Urban Decay's Naked 2 Palette? Pretty darn close. There are a few that are slightly off but for the most part, they're very similar and you definitely don't need both palettes. There's also a difference in formulas and consistencies as well. I'll break it down for you.
  • #1 vs. Foxy - Foxy is slightly less dry than #1 but they both seem to be the same shade and have a slightly chalky finish to both. 
  • #2 vs. Half Baked - Almost exactly the same except I think that Half Baked has slightly larger glitter in it.
  • #3 vs. Bootycall - The swatches above don't show it very well but #3 has pink undertones while Bootycall has peach undertones.
  • #4 vs. Chopper - Same.
  • #5 vs. Tease - #5 is softer than Tease but the color is the same.
  • #6 vs. Snakebite - Snakebite is WAY more of a blackened gold than #6. It is significantly darker in person.
  • #7 vs. Suspect - Same.
  • #8 vs. Pistol - Same.
  • #9 vs. Verve - Verve is softer and more pigmented while #9 had to be built up (like, one more swipe) to be the same opacity. Verve is also more beige-y while #9 has some warmer undertones.
  • #10 vs. YDK - Exactly the same.
  • #11 vs. Busted - Busted is way more pigmented. WAY more.
  • #12 vs. Blackout - The same which is impressive because I can't even tell you guys how hard it is to find a nice, pigmented black. Bravo!


Amazing Lipstick in Love Nude ($1.50) - Love Nude is a satin-y nude with brown undertones. I found that the color would be flattering on most skintones because it starts off sheer but can be re-applied to build up opacity. That being said, I wasn't a fan. The scent of the lipstick is black licorice which I don't find appealing (personal preference) and the consistency of the lipstick felt almost cheap. 

Salvation Intense Lacquer in Gave You All My Love ($4.55) - I'm normally not a fan of glossy lipglosses (doesn't that make sense?) but I really liked this one. It's not sticky but has a high shine and is nicely pigmented. The color itself is an intense fuchsia with subtle shimmer. The only thing I wasn't a fan of was the scent which smells like a weird, cheap cherry. Wasn't a fan.


Overall: Out of the bunch, the Redemption Iconic 2 Palette was the all-star! I was very impressed with the pigmentation and general application of the shades. For a drugstore palette, this rivals some of the high-end alternatives - including it's infamous dupe! 

Makeup Revolution || Site - Buy - FB - Instagram
* Press samples

Heavy Metal | Copper Tones

$
0
0
Vampy lips and cranberry tones take over once autumn comes around but I'm ready to rock the look below instead! I love, love, love metal tones  and copper looks, don't you? 

I was going through my September Rite Aid Network box and fell in love with some goodies from the company Total Intensity by Prestige. Have you tried them? To be honest, I wasn't familiar with the brand but after creating the look below, they'll be on my list to check out more the next time I head over to Rite Aid!


HOW TO GET THIS LOOK:
  • I started off using Total Intensity Total Wear Shadow Stick in Desert Delusion all over the top lid and bottom lid. I then blended it out using my Sigma Shader brush up into the crease.
  • I then took Kat Von D's Papilo from the Monarch Palette into the crease and up for a nice transition in a windshield wiper motion.
  • Back to the lid, I applied Total Intensity True Metals Eyeshadow in Copper in a soft, patting motion. I love using a shadow stick underneath eyeshadows (especially glitter ones like this!) because it provides a nice base to stick to.
  • I also brought Copper to the bottom lid over Desert Delusion as well.
  • For lashes, I went with Ardell Demi Wispies (I can't get enough of these!) and then took Total Intensity Beyond Lashes Mascara in Molten Brown on the bottom lashes as well as the top to blend the falsies with my real lashes together. A brown mascara really gives a softer, more natural look to lashes that I love.
You can find Total Intensity at your local Rite Aid. Let me know what you guys get! 

* Some products were provided by Rite Aid as a blogger for their network.

Kat Von D Everlasting Lipsticks in Lovesick, Exorcism and Damned - Swatches & Review

$
0
0
Let's talk liquid lipsticks. I don't think there's a beauty company out there that doesn't have their own version out right now. Sometimes it's hard to navigate through them all and really see which ones are worth the moola, am I right?

Kat Von D's Everlasting Liquid Lipsticks are at the top of the must-have list of liquid lipsticks. The majority (if not all) of them are incredibly creamy and pigmented with a matte finish. I've reviewed in the past Bachelorette and Mau5 and just recently snagged three more on my most recent trip to Sephora. Let's get to it!
  • Lovesick - a mauve nude. I would describe it as a soft, dusty cool-toned mauve-y nude and it literally my new favorite pink lipstick like, ever. True to Kat Von D's liquid lipstick formulas, it's incredibly creamy, pigmented and smooth to apply.
  • Exorcism - a ripe blackberry. Hellllllo fall! This is your quintessential vampy fall lipstick, for sure. Again, the consistency is nice and creamy. I really loved that I could keep reapplying this and fixing it if I didn't get a nice line the first time without it getting crumbly or patchy on me.  
  • Damned - a black cherry. Another fall favorite. Damned has a bit of a brown undertone. It legit makes me feel like a vampire, guys or that I could go kick some ass with it on or something. I don't even know why. Like the other two, the formula was smooth to work with and creamy to apply. No feathering or bleeding to report even going into the wee hours of the night.

Overall: The entire time I was swatching/wearing/editing these lipsticks and pictures, I'm like, "Why the heck don't I own the entire collection?" I can't say enough good things about these liquid lipsticks from Kat Von D. Every lipstick I've bought has been a dream to work with - creamy, pigmented, smooth to apply, no bleeding or feathering, long wear time. It's all there. I highly recommend picking up some of these and adding them to your collection!

Kat Von D | Shop ($20)

BoxyCharm | September Box - Runway Ready

$
0
0
Hey babes! I'm back with BoxyCharm's September box (a teensy bit late but better than never)!

What's BoxyCharm, you ask? BoxyCharm is a beauty subscription that comes to your doorstep every month with 4-5 full size luxury items for $21 a month. While that might sound a little more expensive than other subscription services, consider that you're getting guaranteed four full size products every month while compared to Ipsy where it's only $10 but they're usually smaller samples. The promise of full sized products alone totally got me hooked on it!


  • Scratch Nail Wraps in "Lacework" ($12) - You guys have no idea how excited I was to see Scratch Nail Wraps in this month's box! I'm obsessed with these babies and can pretty much go on record saying that they're the best I've ever used. They're thinner than other wraps so when you apply it to your nail, it applies easily and smooth. And let's talk about the design! Lacework is two fun designs in one - a beautiful clear wrap with a fun white criss-cross design with gold half moon along with a gold half moon with gold tips.
  • Kardashian Beauty Black Seed Dry Oil (???) - I had never used Black Seed before trying this out so I wasn't sure what to expect. It's supposed to nourish your hair so it appears strong, thick and smooth with no residue left behind. I applied it to the ends of my hair and noticed that they felt softer instantly!
  • Vasanti Professional Foundation Brush ($32) - I'm a BeautyBlender kind of gal for foundation but I love using this brush for cream bronzer and contour. The brush is soft, holds it shape and applies the product nicely without any patchiness.
  • Previse Skincare HydroMilk Hydrating Lotion ($48) - This is a contender for one of my new favorite moisturizers! HydroMilk contains hyaluronic acid, botanicals and a blend of essential fatty acids that repair your skin as well as moisturize it.
  • tarte SmolderEYES Amazonian Clay Waterproof Liner in Bronze Gold ($19) - It's been a long time since I've used a chunky eyeliner but I'm in love! What I love about this is that it's pigmented and doesn't transfer like some thicker eyeliners do on me. I'm also in love with the color itself. It's a smokey bronze-y gold that is so stunning. I actually wore it in my Mummy Tutorial

BoxyCharm | Shop + $21 a month
* Press sample

#HallowCleanOff | Skeleton Halloween Makeup Look with Neutrogena

$
0
0
This shop has been compensated by Collective Bias, Inc. and its advertiser. All opinions are mine alone. #HallowCleanFaceOff #CollectiveBias

Halloween is upon us, ghoulfriends! Woohoo! It's officially 16 days away and if you're like me, well, you probably don't have your costume planned (I mean, how can I pick just one!?) and wait last minute for these kinds of things. Don't you worry! I've got you covered. 

Today I'll be showing you how to create an easy skeleton look with the most basic of face paints and techniques - AND on top of that, I'll be showing you a fast, sure-fire way to remove your makeup at the end of the night! Let's get to it.


HOW TO GET THIS SKELETON LOOK:
  1. We're going to start off by applying your favorite foundation. I like this technique instead of just slathering on the white face paint because I think it creates a more natural "off-white" look.
  2. Using a foundation brush, apply the white face paint. You can go ahead and skip the area around your eyes as we'll be filling that in later with black.
  3. Using a black eyeliner, face paint or even a liquid liner, create a "M" on your nose and fill it in, making sure to get the sides and under the nose.
  4. Take the black face paint and start filling in your eye sockets. Feel for your actual eye sockets instead of creating circles. Remember they don't have to match :)
  5. Set your nose and eye sockets with matte black shadow so they don't crease.
  6. Outline your jaw "socket". Get a feel for your own.
  7. Taking a small, detail brush and some black face paint (or liquid liner) sketch out your teeth on your lips and extend them out.
  8. Let's "sink in" our temples by shading them in with black shadow or face paint.
  9. Going back to the jaw, we're going to color in the rest with black face paint.
  10. Outline the teeth with black shadow and blend it out.
  11. (Optional) Scrunch your face into an angry pose and fill in any lines caused by the pose near your eyebrows and nose to give your skeleton a mischievous look.
  12. (Optional) Bring the skeleton down your neck by creating three "squares" and then fill the area around your neck in with black paint. Set with black shadow.
PHEW! After a long night of tricks and treats, scary movies and candy binging, you'll probably want this makeup off. I'll admit that although a full face is fun to wear, it can be an absolute pain to remove. After searching for forever for the perfect remover, I finally found a super gentle remover that gets the job done - right in the skincare aisle at Walmart!
It's the Neutrogena Makeup Remover Cleansing Wipes and guys, they're amazing! What I love the most is that they're gentle enough that they can be used around the eye area without an irritation. They're also clinically proven to remove 99.3% of your most stubborn makeup - even waterproof mascara! 

I was challenged by Neutrogena to "un-Halloween" at the end of the night and remove all of my costume makeup - WITH ONE WIPE *enter dramatic music*. Oh, it's on!


HOW TO REMOVE YOUR HALLOWEEN MAKEUP:
  1. Start with the Neutrogena Makeup Remover Cleansing Wipes and gently rub away your makeup.
  2. Then I take about three pumps of the Neutrogena Ultra-Light Cleansing Oil and apply it to a dry face with dry hands. I massage that all over my face and then rinse with water.
  3. Lastly, I wash my face like normal and apply a moisturizer!
What do you think of this look? Would you rock a more complex makeup if you knew it'd be easier to take off at the end of the day?

This shop has been compensated by Collective Bias, Inc. and its advertiser. All opinions are mine alone. #HallowCleanFaceOff #CollectiveBias

Phuse | So Shady Smokey Eye Brush + Review

$
0
0
Hey babes! Phew. It's almost the weekend. Woohoo! Today I wanted to show you a look I came up with using the Phuse So Shady Smokey Eye Brush!

The So Shady Smokey Eye Brush from Phuse is a brush used to smolder and blend out a smokey eye with ease. The brush is densely packed with round bristles into a tapered shape to get into the crease and be able to blend out the shadow easily. The brush is SO soft and worked really nicely. I was also impressed with how versatile this brush is and can be used for different purposes besides just blending out a smokey eye. I also used this brush as a great brush to apply shadow into the outer v. and it worked amazingly.

For this look: I started with the MAC Painterly Paint Potas a base. Then I came in with Kat Von D Mi Vida Loca Remix Palette's Misfit, Hyperballad and Dark Wave across the lid. I then took Noble into the crease to blend it all out into the crease. Using the So Shady Smokey Eye Brush and Black Metal from the palette, I applied it into the outer v and smoked it out. Then I took Echo and applied to my lower lid and smokey that out as well with the same brush. Lastly, I applied Love in the inner corner. Taking my Kat Von D Autograph Liner, I created a cat eye. I used Ardell Demi Wispie lashes and finished my brows with Anastasia Beverly Hills Brow Wiz.

Phuse | Shop
* Press Sample

ColourPop Ultra Matte Liquid Lipsticks in Instigator, Chilly Chili, BadHabit, More Better & First Class

$
0
0
It's Friday, y'all! Anyone else feel me when I say that that means absolutely nothing to me now that I have a toddler? Whomp, whomp, whomp. I can at least pretend I had a crazy night out when I wear one of these lipsticks. They're the new limited edition ColourPop Ultra Matte Liquid Lipsticks from their Fall '15 collection and I mean, sa-woon, right?! How gorgeous are these colors?

  • Instigator - a mid-tone peachy pink. Instigator reminds me of Lime Crime Babette but like, a thousand times better. Babette ended up pulling extremely orange on me and it looked horrible. Instigator, on the other hand, does have a slightly peach undertone but actually looks flattering on pale skin. The formula on this is way different than the first liquid lipsticks I tried from ColourPop. This one is slightly thick and goes on so, so creamy. What a dream!
  • Chilly Chili - a muted plummy brown. Oh Chilly Chili, you are ah-maze-ing! If you could only buy one lipstick from this collection, it's this one. Hands down. The color is to die-for and the formula is out of this world and similar to Instigator. Super creamy, pigmented and applies like a dream.
  • Bad Habit - a dusty mauve pink. I sound like a broken record because again, this was fabulous to work with. Pigmentation was on point, creamy but not too thick and easy to apply.
  • More Better - a deep violet wine. Unfortunately, the record stops here. More Better was odd to apply. The consistency was too thick and almost dry. I wonder if maybe I got a bad batch? Love the color but pretty disappointed in this shade.
  • First Class - a vivid orange red. Then we go from one extreme to the other. First Class was very liquidy and applied super patchy. Again, I loved the color but it's a bummer about the consistency.
Overall: I love Instigator, Chilly Chili and More Better. I love the new formula on these three. Unfortunately, I think More Better and First Class fell short. First Class reminded me of the old formula and More Better just seemed like a bad batch. Three out of five ain't bad, right?

ColourPop | Shop ($6)

Halloween Makeup Tutorial | Pink Fairy

$
0
0
Awwwyus. Guys, there are nine days left until Halloween and I am back with another makeup tutorial! First off, can I just say that I'm so proud of myself for plowing through and doing more than just one tutorial this year. I normally have a huge list of costumes and makeups I want to do and then I'm like, "Crap. Next year. For sure." So yay Noelle! 

So recently, I received this gorgeous pink wig from the amazing people at Wigaholics and had a blast coming up with this easy, pink fairy look for Halloween. I actually have two other costume ideas I'd like to use with this wig as well. Would you guys be interested in seeing them? We can do a one wig, three looks kind of thang. Let me know in the comments! 

Let's talk about this wig real quick, shall we? I absolutely love this one from Wigaholics! It's the Baby Pink Long Wavy 75cm Wig and it's amazinggggg! It's a basic cap with clips and is made from Hiperlon Fiber. It can be styled with heat tools and comes with a wig stand, brush and wig cap. I can't get over how well this is made and felt confident that there would be no issues (falling off, shedding like crazy, sliding down, etc.) with wearing this out. The quality is so luxe but the price ($30-40) is so on point. The site has so many different wigs to choose from and covers a variety of looks. From short styles to insane mermaid manes, ombré to solid color, Wigaholics seriously has it all. 

How to get this look:

  1. For this look, I really wanted a dewy, almost ethereal foundation base. To achieve this, I mixed my It Cosmetics CC+ Cream (in light) with Rouge Bunny Rouge Seas of Illumination (one pump of cc cream to two big pumps of illuminator) and applied that with a damp Beauty Blender.
  2. Next, I laid down MAC Paint Pot in Painterly as a base for my eyeshadows onto my lids. 
  3. Then I took Anthem from the Kat Von D Mi Vida Loca Remix Palette and took that into my inner corner and brought it up to my eyebrow and blended it out to the tail of it.
  4. Then I took Swoon into my crease and blended it all the way out to my temple.
  5. For the lid, I patted Love onto my lid. Then I mixed Love and Swoon together and took that back into the crease to blend it all together seamlessly.
  6. Last minute, I decided to pat Skull into the inner corner for a nice iridescent effect over Anthem.
  7. Then I wet Rewind and Love and drew long feather-like strokes coming out of my eyebrows.
  8. For lashes, I went with Ardell #220 Demi Wispies and Tarte Lights, Camera, Lashes on the bottom lashes.
  9. For dat glo tho, I applied ColourPop Wisp and then Becca x Jaclyn Hill's Champagne Pop over it. 
  10. Lastly, for the lips, I wanted to keep it lowkey and light and went with ColourPop Shimmy but you can change it to whatever you want. A pastel lavender would look amazing!
I hope you guys enjoyed this tutorial and I'll see you back here for the next one! :) 

* Wig was sent to me for review. 
Viewing all 925 articles
Browse latest View live